


Hang the bottom of your chandelier 30–36 inches above the tabletop. That’s the baseline, and it works for most Canadian dining rooms with a standard 8-foot ceiling. Home Depot Canada and The Spruce both land on the same number, and it holds up in practice because it keeps the fixture close enough to feel intimate without blocking anyone’s view across the table.
Quick numbers to keep handy:
- Baseline: 30–36 inches from tabletop to the chandelier’s lowest point
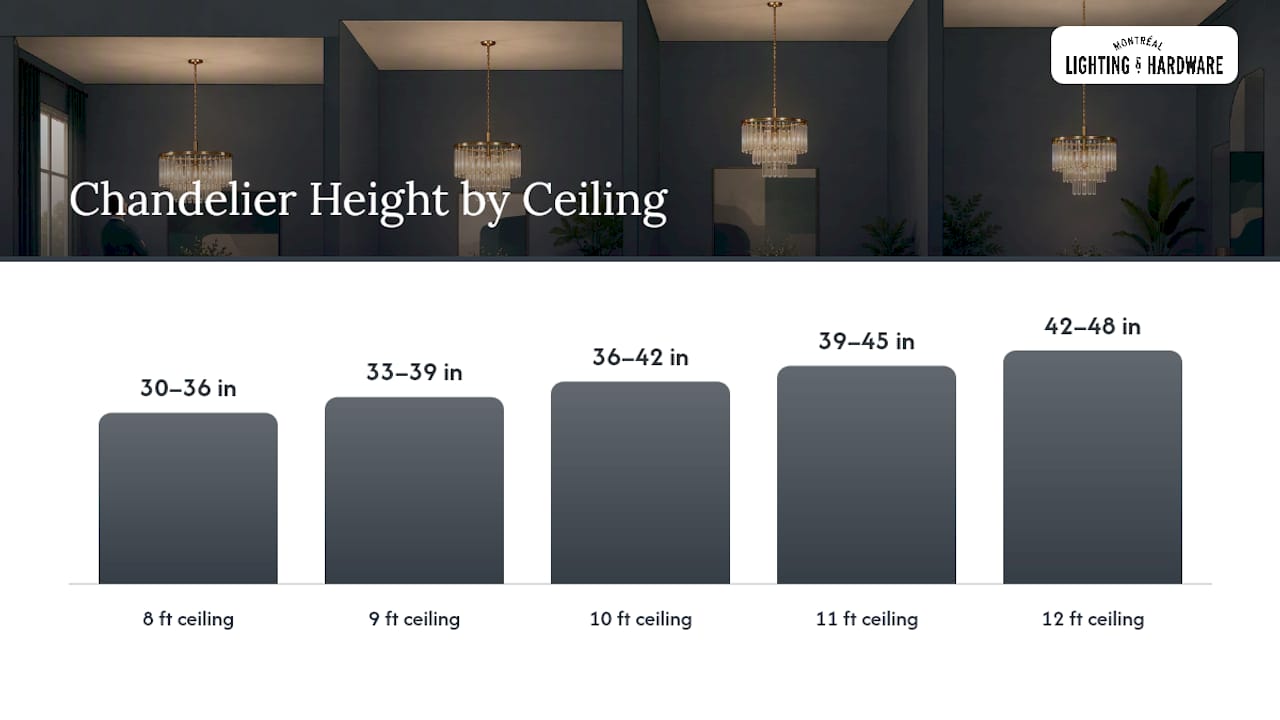
- Ceiling adjustment: Add about 3 inches for every foot of ceiling height above 8 feet
- Open rooms: Keep at least 7 feet of clearance between the floor and the fixture’s lowest point when no table sits beneath it
Pro Tip: Measure to the lowest decorative element — a crystal drop, a finial, a pendant tip — not to the fixture’s frame or canopy. That’s the point that actually determines your clearance.
Key Takeaways
Hang the bottom of your dining room chandelier 30–36 inches above the tabletop for an 8-foot ceiling, then raise it 3 inches for every additional foot of ceiling height.
| Point | Details |
|---|---|
| Baseline rule | Hang the chandelier’s lowest point 30–36 inches above the tabletop for an 8-foot ceiling. |
| Ceiling adjustment | Add 3 inches per extra foot of ceiling height above 8 feet to keep the fixture visually connected. |
| Sizing formula | Choose a fixture diameter equal to 1/2 to 2/3 of your table width, or table width minus 12 inches. |
| Measure correctly | Always measure to the lowest decorative element — crystals or finials — not the fixture frame. |
| Montreal Lighting & Hardware | Browse chandeliers sized to these guidelines and get trade or showroom support across Canada. |
Table of Contents
- How ceiling height changes the right hanging distance
- How to size a chandelier to match your table
- How to measure and hang your chandelier step by step
- Spacing and height for multiple pendants and linear chandeliers
- When to deviate from the standard rules
- How bulb choice and dimmers affect the feel of your chandelier
- Why designers settled on 30–36 inches: the reasoning behind the rule
- Find the right chandelier at Montreal Lighting & Hardware
- Sources
How ceiling height changes the right hanging distance
The 30–36 inch rule assumes an 8-foot ceiling. Go taller, and a chandelier hung at that same distance starts to look like it’s floating disconnected from the table below. The fix is simple: raise the fixture about 3 inches for each additional foot of ceiling height, per The Spruce’s installation guidance.
A quick example for a 10-foot ceiling: add some additional height to the baseline to keep the chandelier visually connected to the table. For 9-foot ceilings, raise it slightly more.
- 8-foot ceiling: 30–36 inches above table
- 9-foot ceiling: a bit higher than the baseline
- 10-foot ceiling: higher still
- 12-foot ceiling: substantially higher than 8-foot baseline
For open-plan spaces where the chandelier hangs without a table directly beneath it — say, over a pass-through or a foyer that flows into the dining area — Home Depot Canada recommends a minimum of 7 feet of floor clearance. That’s the number that keeps adults comfortable and prevents the fixture from feeling like an obstacle.
Pro Tip: Always measure to the lowest physical point of the fixture before you finalize the chain or rod length. Crystals and finials are often 2–4 inches below the frame, and that gap is what Luxe Living Insights flags as the most common measurement mistake installers make.
How to size a chandelier to match your table
Height is only half the equation. A fixture that hangs at the perfect distance but looks too small or too wide for the table will still feel off. The proportion rules here are straightforward.
The two sizing formulas:
- Formula 1: Fixture diameter = 1/2 to 2/3 of table width
- Formula 2: Table width minus 12 inches (a quick shortcut for rectangular tables)
Both come from The Spruce’s chandelier guide and hold up well across common table sizes.
For a 72-inch table, Formula 2 gives you 60 inches, which is on the large side. In practice, a fixture in the 36–48 inch range (Formula 1) tends to look more balanced and leaves breathing room around the table’s edges. Formula 2 works best for narrower tables where you want a bolder visual statement.
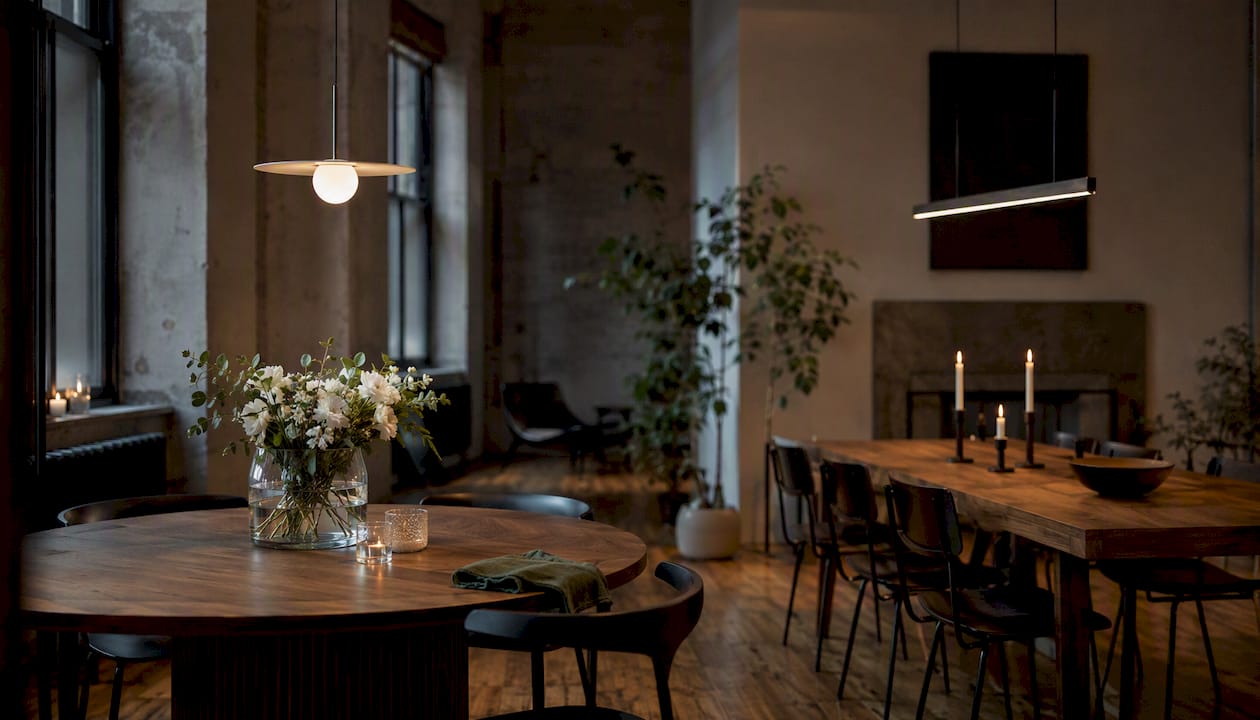
Round vs. rectangular tables: A round table pairs naturally with a round chandelier centered directly overhead. For rectangular tables, a linear or oval fixture running parallel to the table’s long axis reads as more intentional than a single round chandelier centered on a long expanse of wood. Fixture shape affects perceived size — a linear fixture at 48 inches long reads larger than a round fixture of the same diameter.
How to measure and hang your chandelier step by step
Getting the height right before you commit to wiring saves a lot of frustration. Here’s what you need and how to work through it.
Tools:
- Tape measure
- Ladder (stable, rated for your weight plus the fixture)
- Helper (required for safety and accuracy)
- Painter’s tape or a temporary hook
- Stud finder and voltage tester
Steps:
- Measure your tabletop height. Most standard dining tables sit between 28 and 30 inches from the floor, though counter-height tables run taller. Measure yours directly rather than assuming a standard, as Carpenter James notes that table heights vary more than most homeowners expect.
- Calculate your target drop. Add your tabletop height to your desired chandelier clearance (30–36 inches for an 8-foot ceiling, adjusted upward for taller ceilings). That total is your measurement from the ceiling to the fixture’s lowest point.
- Mark the drop with painter’s tape. Hang a piece of tape or a lightweight placeholder at the calculated height. Sit at the table and check sightlines — you should be able to see everyone across the table without the fixture blocking your view.
- Adjust chain or rod length. Most chandeliers ship with extra chain. Cut or loop it to hit your target drop, confirming the measurement goes to the fixture’s lowest decorative element, not its canopy.
- Turn off power at the breaker. Confirm with a voltage tester before touching any wiring. Have your helper steady the ladder.
- Mount and finalize. Secure the mounting bracket to the electrical box, connect wiring, and hang the fixture. Check that the electrical box is rated for the fixture’s weight.
Pro tip from the install floor: Luxe Living Insights recommends using a temporary hook or a taped outline on the ceiling to mock up the fixture’s position before committing. Spending five minutes on this step prevents a second trip up the ladder.
Spacing and height for multiple pendants and linear chandeliers
A single chandelier centered over a round or square table is simple. Multiple pendants over a long rectangular table — or a linear chandelier spanning an island — needs a bit more planning.
- Two pendants: Space them roughly one-third of the table length from each end, centering the pair over the table’s midpoint.
- Three pendants: Divide the table into equal thirds and center one pendant over each zone.
- Four pendants: Space evenly, keeping 12–18 inches between pendant edges depending on fixture diameter.
Linear chandeliers behave differently from single-center fixtures. Because they run parallel to the table’s long axis, they often look better hung a few inches higher than the standard baseline — closer to 36–40 inches above the tabletop — to keep sightlines clean across the full length of the table. The visual weight of a long fixture at 30 inches can feel heavy and low, even when the math says it’s correct.
Pro Tip: For linear fixtures, check the sightline from the short end of the table, not just the long side. That’s the angle where a too-low linear chandelier is most likely to feel intrusive.
When to deviate from the standard rules
The 30–36 inch guideline is a starting point, not a ceiling (no pun intended). Several real situations call for a different approach.
- Oversized statement chandeliers: A large, visually busy fixture with lots of arms, crystals, or downward-facing elements can feel oppressive at 30 inches. Raising it to 38–42 inches above the table often reads better, even on a standard ceiling.
- Low ceilings (under 8 feet): Prioritize the 7-foot floor clearance rule first. If your ceiling is 7.5 feet and your table sits at 30 inches, you have very little room to work with. A flush-mount or semi-flush fixture may serve the space better than a chandelier with significant drop.
- Counter-height or bar-height tables: These tables sit 34–36 inches from the floor, which compresses the available clearance. Measure from the actual tabletop and apply the same 30–36 inch rule from that surface.
- Mixed-use dining spaces: If the table doubles as a workspace or homework station, a slightly higher hang (36–40 inches) reduces glare during daytime use without sacrificing the intimate feel at dinner.
- Low-profile linear fixtures: Slim, horizontal fixtures with minimal drop can hang closer to the ceiling without feeling disconnected, because their visual weight is distributed across the table’s length rather than concentrated at a single point.
How bulb choice and dimmers affect the feel of your chandelier
The right hanging height matters less if the light itself is harsh or poorly directed. Bulb choice and dimming control shape how the fixture feels in the room, and they can make a slightly lower or higher hang feel entirely natural.
- Lumens: Choose bulbs to provide sufficient light for dining without overwhelming the space.
- Color temperature: A warm light appearance is generally preferred for dining areas.
- CRI: Higher color accuracy bulbs enhance the appearance of food and decor.
- Dimmers: Adjustable lighting helps create the desired mood and minimizes glare.
Confirm dimmer compatibility before purchasing bulbs — not all LED bulbs dim smoothly on every dimmer circuit.
Why designers settled on 30–36 inches: the reasoning behind the rule
The 30–36 inch standard isn’t arbitrary. It comes from a few practical constraints that converge at the same number.
Sightlines across a dining table matter for conversation. At 30 inches of clearance, most adults seated at the table can see each other without the fixture interrupting the view. At much less than 30 inches, the chandelier starts to divide the table visually. At much more than 36 inches on a standard ceiling, the fixture begins to feel disconnected from the table it’s meant to anchor.
Glare control is the other driver. A chandelier hung too low directs light sources into seated diners’ eyes. The 30–36 inch range keeps most bulbs above the natural sightline of a seated adult, reducing direct glare without pushing the fixture so high that it stops illuminating the table effectively.
Standard dining tables in Canada typically sit between 28 and 30 inches from the floor, as Carpenter James documents. That means a chandelier hung at 30 inches above the tabletop sits roughly 58–60 inches from the floor — well above seated eye level for most adults, and comfortably below the 7-foot floor clearance threshold even on a low ceiling.
The Montreal Lighting & Hardware perspective on getting this right
The 30–36 inch rule is reliable, but the measurement step is where most installations go sideways. At Montreal Lighting & Hardware, we see it consistently: homeowners measure to the fixture frame and forget that crystals or finials add another 2–4 inches of drop below that point. The result is a chandelier that hangs lower than intended and feels intrusive at the table. Measure to the lowest decorative element every time, and mock up the position with a temporary hook or a taped outline before you finalize the chain length. Those two habits alone account for most of the difference between a chandelier that looks placed and one that looks installed.
Find the right chandelier at Montreal Lighting & Hardware
Getting the height right starts with choosing a fixture sized for your table. At Montreal Lighting & Hardware, Canadian homeowners and design professionals have access to a curated selection of chandeliers scaled to the proportion guidelines in this guide — from the compact Crystorama Hulton Five Light Chandelier suited to mid-size dining tables, to the statement-scale Hulton Six Light for larger rooms. Trade professionals can access exclusive pricing through the trade program, and the showroom team can help you confirm proportions before you commit to a fixture.

Browse the full chandelier catalog online or visit the showroom to see fixtures at scale. When you’re ready to choose, the team can match you to the right diameter and drop length for your specific ceiling height and table size.
Sources
- How to Hang a Dining Room Chandelier at the Perfect Height
- Chandelier height above dining table and how high it should hang – Luxe Living Insights
